FAQ
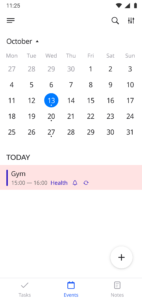
Events Section
Use Events Section for activities and tasks which have a time frame to fast and easy find out if you’re busy at a certain point in time:
• meeting with a partner
• hair stylist
• gym training
• meeting
• theater etc.
You may set an exact time frame or that an Event lasts the whole day (for example, Mom’s birthday), set a priority and notification for it and add it to the Project
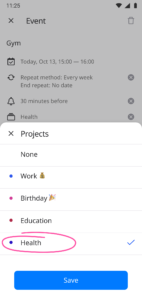
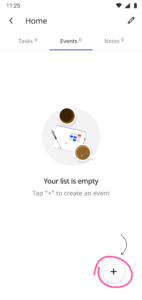
- Select Events tab
- Press +
- Enter Event name
- Select an Event date
- Set a start and the end time for an event. Alternatively, you may set it to the «Whole day»
- Set notification time
- Add the event to the required Project
- Set the priority for the Event (if necessary)
- Save an Event
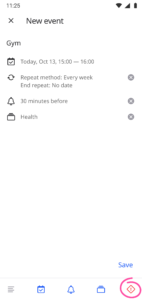
- Select Events tab
- Press +
- Enter Event name
- Select the Event date
- Start and end time. Or you may set its duration to the whole day
- Select a repeat method
- Set notification time
- Add the event to the required Project
- Set the priority for the Event (if necessary)
- Save an Event
- Select Events tab
- Select the Event you want to edit
- Click its name and a field for editing will appear
- After making changes, save the Event
- The Event will be changed
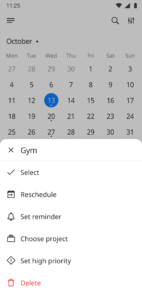
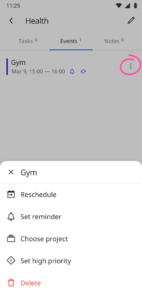
- Go to the Events section
- Find the required Event
- Click on the 3 dots next to the Event
The following actions are available:
- Rescheduling the Event
- Setting the reminder time
- Selecting/moving the Event to another Project
- Setting the Event Priority
- Deleting the Event
Select the action you need and confirm it
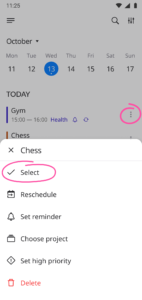
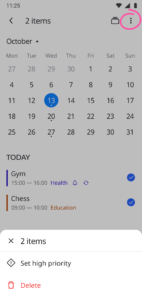
- Select the Events tab
- Click on the 3 dots next to Event
- Select the required Events
- Click on the 3 dots on the top right corner of the screen
- Confirm the required action
- When creating an Event, you may set a priority which will which will indicate the importance of the Event.
- The Event will be colored red
- On the Event create/edit page, select a description icon
- Enter a description you need
- After entering the required information, save the Event

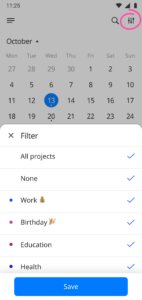
- In the top-right corner select the Event Filter button and select a required one
- You may filter your Events by specific projects, by events that do not belong to any specific project as well as by all projects
- Select Events tab
- Click the magnifying glass icon in the top-right corner to find the required Event
- Enter the Events’ name in the search field and select the required one
Listta Pro.
Subscribe to Listta Pro to get access to the extended Apps functionality and additional super functions:
- No ads
- Dark mode
- Unlimited number of projects
- Long reminding melodies
- Priority support

The Listta application, being a personal assistant, will help you structure your life: do not forget about important events and meetings, complete tasks on time and keep all ideas and useful notes in one place
Our team continues to develop the application, making it even more useful and of high quality. Although Listta’s business model is based on a paid subscription, the main features of the application are available free of charge to all users
Here is what’s included in the free version:
Tasks Section
- Unlimited Tasks
- Tasks Description
- Short Reminders
- Date selection
- Setting Task Recurrences
- Project Assignment
- Setting the Tasks Priority
- Using two types of displaying Tasks (list and calendar)
- Sort by name, reminder time, priority
- Easily customise Task display by completion and projects
Events Section
- Unlimited Events
- Events Description
- Short Reminders
- Selecting the reminder time (at the time of the event, 5 minutes before, an hour before, etc.)
- Date and time selection
- Setting Event Recurrences
- Project Assignment
- Setting the Events Priority
- Easily customise Events display by projects
Notes Section
- Unlimited Notes
- Unlimited Folders
- Using Pinning Important Notes
- Search Notes
- Project Assignment
Projects Section
- Installation 5 Projects
- Setting Project names
- Selection of Projects color
- Work with Tasks, Notes and Events right inside projects
Profile
- Name Changes
- Setting a password
Support Service
You can subscribe to Listta Pro directly in the app. You will have full access to the premium functions
To view subscription options in the app, tap Menu — Upgrade to Pro
We offer monthly, semi-annual and yearly subscription options. If you subscribe for six months or a year, the entire amount will be deducted immediately. If you do not cancel the automatic renewal of your subscription, it will be automatically renewed after the free trial period or the current subscription period in accordance with the chosen tariff

Every user has a seven-day free trial period of a paid Listta Pro subscription. By choosing any of the offered tariffs, you will automatically start the trial period. If you decide not to use a paid subscription after the trial period, you must disable it in your phone settings before the end of the seven days of the free trial period, otherwise the subscription cost will be automatically charged
If at the end of the free trial period you want to continue using a paid subscription, the funds will be automatically debited from your card in accordance with the tariff you have chosen
- Open the Settings app
- Click your name
- Click «Subscriptions»
- Choose a subscription to manage
- Click «Cancel Subscription»
- Click «Confirm» in the pop-up window to confirm the cancellation
- Sign in to reportproblem.apple.com
- Sign in with your Apple ID and password
- Click «I need» and then select «Request a refund»
- Select the reason why you want a refund and click «Next»
- Select an app, subscription, or other item, and then click Submit
If you can’t submit a refund request on reportaproblem.apple.com
- If the payment is pending, you will not be able to request a refund. Try to resubmit the request when the payment is made
- If you have an unpaid order, you must pay for it before requesting a refund. You may need to update your billing information
- If you do not know why the funds were debited, review the purchases of your family members. If you are in charge of family sharing, tap the Apple ID button, then select Everyone. Displays purchases paid using your shared payment method
- Open the Google Play App
- In the upper right corner of the screen, click on the profile icon
- Select Payments & Subscriptions
- Find the subscription you want to cancel
- Click Cancel Subscription
- Follow instructions
- Go to https://play.google.com/store/account on your computer
- Click «Order History»
- Find an order
- Click «Request a Refund»
- Fill out the form and indicate that you want to receive a refund
- A «Thank you, we have received your refund request» notification will pop up. You will then receive a letter informing you of your decision. Typically, a response will be received within 15 minutes, but in some cases it may take up to four business days
Notes Section
Use Notes section to conveniently store important information, lists, check-lists as well as spontaneous notes and recording your insights for the day:
- logins and passwords
• movies and books lists
• project ideas
• useful articles links
• insights etc.
You may pin a Note to the project and collect notes to the themed folders for you convenience
- Select Notes tab
- Find the Note you want to edit
- Click its name and an editable field will appear
- After making changes, save the Note
- The Note will be changed
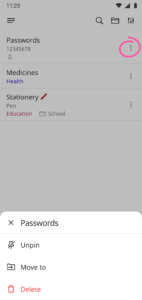
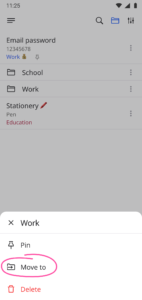
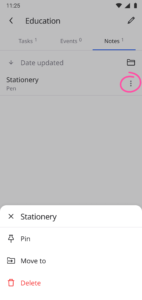
- Go to the Notes section
- Find the required Note
- Click on the 3 dots next to the Note
The following actions are available:
- Pinning Notes
- Moving Notes
- Deleting Notes
Select the action you need and confirm it
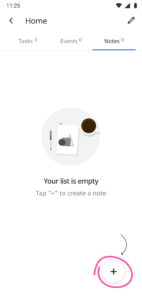
- Select Notes tab
- Press +
- Set the name of the Note or type the information you need
- Add a Project
- Save a Note

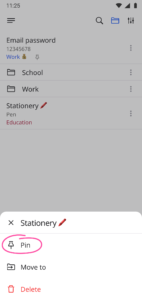
- Select Notes tab
- Find the Note you want to pin
- Press 3 dots at the right and confirm the pinning
- The Note will go up in the list
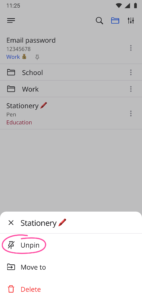
- Select Notes tab
- Find the Note you want to un-pin
- Press 3 dots at the right and confirm the un-pinning
- The Note will be moved at the end of the list
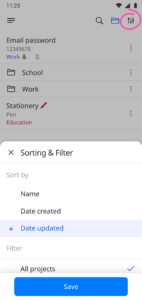
- Select sort icon in the top-right corner. At the moment there are the following types of sorting: by name, by creation date, by update date, by project
- Set the required type of sorting
- Save selected sorting
- Select Notes tab
- Find the Note you want to move
- Press 3 dots at the right and select «Move» button
- Select the required folder or create a new one
- Save
- The Note will appear in the selected folder
- Select Notes tab
- Click the magnifying glass icon in the top-right corner to find the required Note
- Enter Note’s name in the search field and select the required one
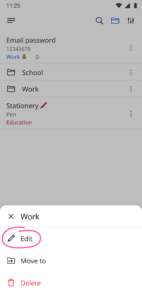
- Select a required folder
- Press 3 dots at the right near the selected folder
- Select «Edit»
- Enter a new name
- Save a folder
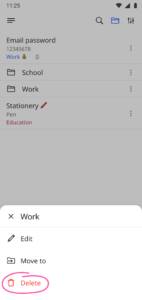
- Select a required folder
- Press 3 dots at the right near the selected folder
- Select «Delete»
- Confirm deletion of this folder and of all its notes and sub-folders
- Alternatively, confirm deletion of this folder and move all its notes and sub-folders to another location
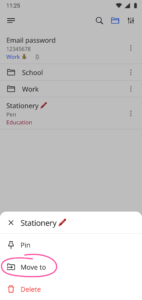
- Select Notes tab
- Find the Folder you want to move
- Press 3 dots at the right and select «Move» button
- Select the required folder or create a new one
- Save
- The folder will appear as a sub-folder in the selected folder
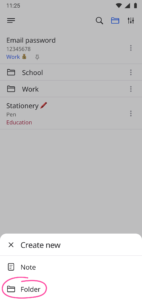
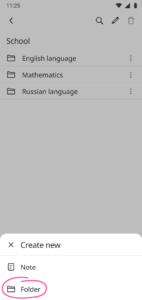
- Select the folder to which you want to add a sub-folder to
- Press +
- Select «Create a new folder»
- Enter Folder name
- Save a folder
Projects Section
Use Projects section to allocate all of your tasks, events and notes to specific areas of your life:
• Business
• Home
• Health
• Recreation
• Hobby etc.
Each project has its own page where you will see all the tasks, events and notes that relate to that focus area. Focusing on a particular direction in your life is easy and straightforward!
You can also create your own projects and select the colours you want them to be labelled with, as well as using themed emojis for a quick visual orientation.
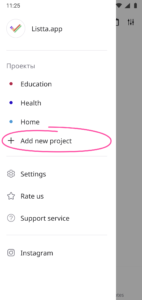
- Click on the icon (three bars) in the upper left corner of the screen
- You will see standard options for Project templates
- As well as you will notice the ability to add a new Project
- Add your projects, change/delete current ones
*Next to the name of the project, you can put an emoticon that you associate with the current Project. It will be visually easier for you to separate tasks in the general list
- Go to the Projects section
- Select the required Project
- Change the name of the Project
- Then select the desired colour of the Project
- Project colour and name will be changed
- Go to the Projects section
- Select the required Project
- Press +
- Enter the name of the Task
- Set a due date for the Task
- Set the reminder time
- Save the Task
- The selected Project will be installed automatically
- Go to the Projects section
- Select the required Project
- Select the Events tab
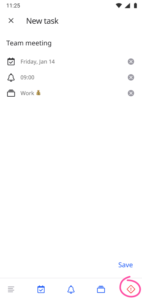
- Press +
- Enter the name of the Event
- Select the Event date of the Event
- Set the start and end of the event. Or you can choose the option «All day»
- Set the reminder time
- Prioritize the event (if needed)
- Save the Event
- Go to the Projects section
- Select the required Project
- Select the Notes tab
- Press +
- Specify the name of the Note, or write the information you need
- Add the Note to the folder, or pin it if necessary
- Save the Note
- Go to the Projects section
- Select the required Project
- Find the required Task
- Click on the 3 dots next to the Task
The following actions are available:
- Transferring the Task
- Setting the reminder time
- Selecting/transferring the Task to another Project
- Setting the Task Priority
- Deleting the Task
Select the action you need and confirm it
- Go to the Projects section
- Select the required Project
- Find the required Event
- Click on the 3 dots next to the Event
The following actions are available:
- Rescheduling the Event
- Setting the reminder time
- Selecting/moving the Event to another Project
- Setting the Event Priority
- Deleting the Event
Select the action you need and confirm it
- Go to the Projects section
- Select the required Project
- Find the required Note
- Click on the 3 dots next to the Note
The following actions are available:
- Pinning Notes
- Move Notes
- Deleting Notes
Select the action you need and confirm it
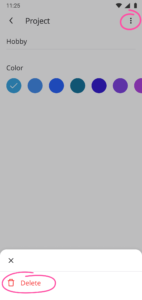
- Go to the Projects section
- Select the required Project
- Select Project Editing
- Then click on the 3 dots in the upper right corner of the screen and confirm the deletion
- The project will be deleted
Settings
Creating an account is a common practice for planning applications. There are considerable reasons for that:
- When planning Tasks for the long run, calendaring and taking notes, data safety is of paramount importance. Account creation makes it possible for you to keep all your data on the server and to be sure to recover them if you lose your phone or accidently delete the app
- An account enables you to access your tasks, events and notes from different devices
- When it is possible to use an app without creating an account, you may skip this important step and later become upset about losing your data which you were accumulating for a long time
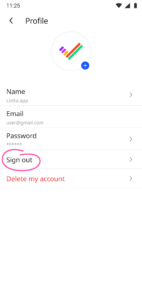
- Log In to your Profile
- Select «Sign out of your account»
- Enter required information to change your account
- Log in to your Profile
- Select «Delete my account»
- Enter the password and confirm deletion
- The account will be deleted after 10 days, and you won’t be able to recover it afterwards
- Within this period, you may request the support to recover your account: info@listta.app

In App settings menu, you may set the required parameters:
- Set the start of the week on the day you need
- Select one of the 34 available languages
- Set the time format: 12-hour or 24-hour system
- Set the counter
- Select notification sound
- The time will be adjusted in accordance with the time zone
- Tasks notifications always activate by the local time. If you have a Task and its notification set at 8:00 am, then in any time zone it will activate at 8:00 am
- And the Events are tied to the time zone in which you have created them. If an Event starts at 9:00 am Moscow time, it will be shown at 2:00 pm Singapore time.
- Full backup copies of the database are created every hour and are stored for one month on our servers
- When deleting an account, it will be deleted after 10 days without recovery possible
- For this period, you may request the support to recover your account: info@listta.app
Synchronization does not occur online. It occurs periodically. It does not imply simultaneous devices operation, but allows one device to receive changes made on another device.
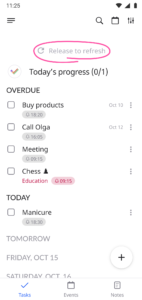
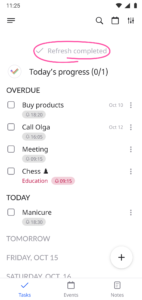
To synchronize right now, you can trigger it on the main task screen by pulling the screen down.
To check you need:
- Turn on the Internet
- Enter a change in the application on the first device, for example, add a task
- In the second device, open Listta, the main task screen
- Pull the screen down, the arrow at the top will scroll — this means that the data has been received
- Data will be synced
This visual part is created to help you easily access your daily progress for completing the Tasks during the day and make a fast decision to improve your effectiveness.
You can monitor the number of open Tasks right at the screen of your smartphone!
There is a Task counter in App settings. You may set the required parameters of turn it off
In App settings menu, you may set the required parameters:
- «Play notification sound»
- «Play system sounds»
- Select notification sounds
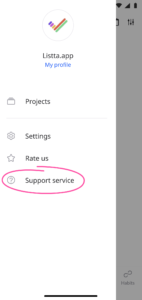
If you have any other questions as well as reviews and wishes regarding our app, you can contact us! We will be glad to help you!
Tasks Section
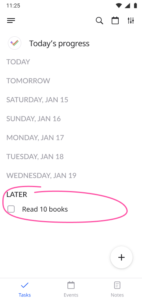
Use Tasks section to remember important activities which have no time frames, but are due on a specific day of the week:
• pay rent and telephone bill
• buy groceries
• choose a present
• fill up the gas tank
• prepare a report, etc.
You can select Tasks convenient for you to repeat (for example, pay rent once a month), set a priority and notification for it, add it to the Project and give it a description
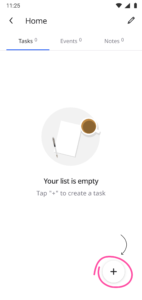
- Select Tasks tab
- Press +
- Enter Task name
- Set a completion date for a Task
- Set notification time
- Save a Task
- Set a notification for a time before the real time you want to complete the Task so you will remember about it before time
- Press on the required day on the main screen of the Tasks section
- A Task will be automatically created for this date (this Function is available when adding Tasks for the next week)
- Enter Task name
- Set notification time
- Save a Task
- Select Tasks tab
- Press +
- Enter Task name
- Set a completion date for a Task
- Select the repeat method you want
- Set a date to stop repeating (if necessary)
- Set notification time
- Save a Task
- Select Tasks tab
- Press +
- Enter Task name
- When creating a Task, «Today» is set as default. Delete it with a cross at the right – the Task will have no date
- Save a Task
Without date and time binding Tasks can be viewed when exiting the calendar mode. They will be shown at the end of the list
- Select the Task you want to edit
- Click its name and an editable field will appear
- Make changes
- After making changes, save the Task
- The Task will be changed
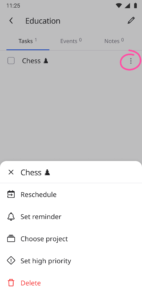
- Go to the Tasks section
- Find the required Task
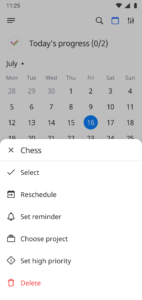
- Click on the 3 dots next to the Task
The following actions are available:
- Transferring the Task
- Setting the reminder time
- Selecting/transferring the Task to another Project
- Setting the Task Priority
- Deleting the Task
Select the action you need and confirm it
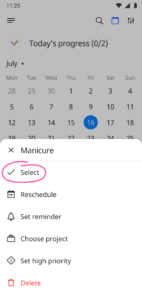
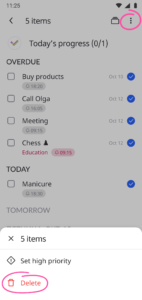
- Select the Tasks tab
- Click on the 3 dots next to Tasks
- Select the required Tasks
- Click on the 3 dots on the top right corner of the screen
- Confirm the required action
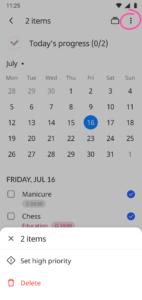
- Switch from the Calendar Mode to the Application main screen
- Click on the 3 dots next to the Tasks
- Select the required Tasks
- Click on the 3 dots on the top right corner of the screen
- Confirm deletion
- Tasks will be deleted

When creating a Task, you may set a priority which will indicate the importance of the Task. The Task will be colored red

- On the Task create/edit page, select a description icon
- Enter a description you need
- Save changes to the Task
* You can use emojis to mark the completion of sub-tasks (soon we will add a fully functional work with sub-tasks)
* Add clickable links and phone numbers for you convenience (soon we will add a feature to pin photos and files)
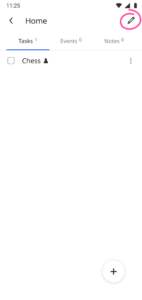
- Press a square near the required Task
- The check mark will appear and the Task will be colored gray
- In the same way you may undo this action (in case of accidental pressing)
Select Sort icon in the top-right corner. At the moment there are the following types of sorting:
- by name
- by notification time
- by priority
- by project
- it is possible to hide completed tasks
When planning the order of tasks completion «throughout the day», it is possible to put a number in the beginning of each Task’s name

- Select the magnifying glass icon to find a Task
- Enter the Task’s name in the search field
- Select the required Task